
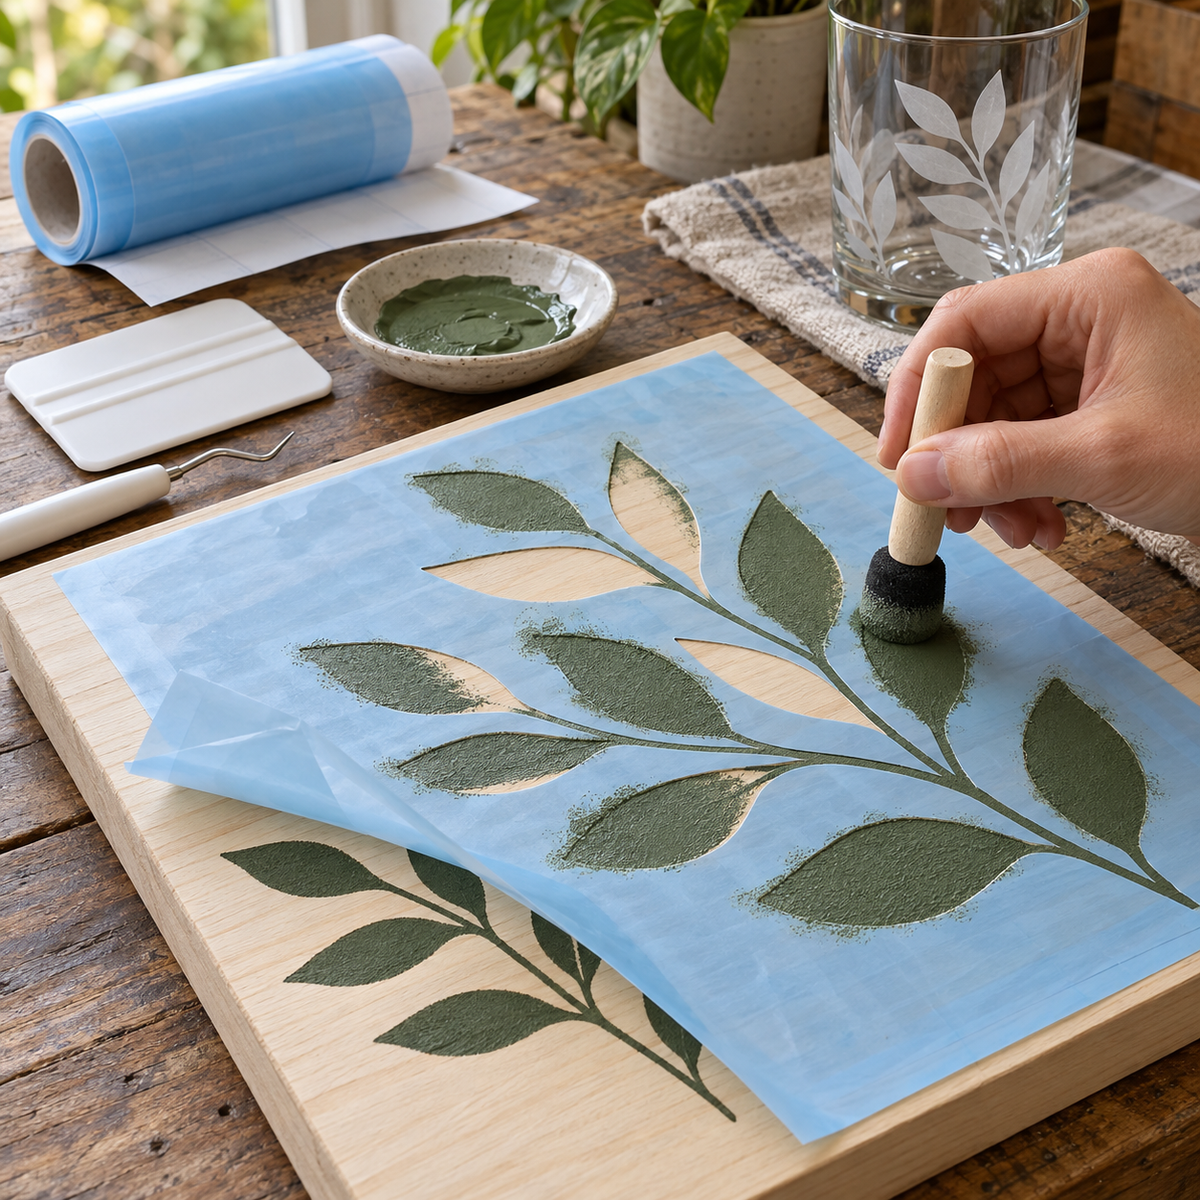
A vinyl stencil lets you paint crisp lettering on a wood sign or etch a permanent design into glass without freehand skill. The problem most beginners run into is bleed: paint creeps under the edges, or etching cream leaks past the stencil, and the result looks fuzzy. This guide covers which stencil material to use, how to cut and weed a stencil the right way, and the techniques that keep your edges sharp.
What Makes Stencil Film Different
A stencil is temporary. It needs to stick well enough to seal the edges against paint, then peel away without lifting the finish underneath. That is why dedicated stencil film uses a lighter adhesive than permanent decal vinyl.
The purpose-built option is ORAMASK 813 low-tack paint stencil film. Here is what sets it apart:
- Rigid 3 mil PVC. The film is stiff enough to hold its shape across open areas of a stencil, so letter centers and thin bridges stay where you put them.
- Low-tack, water-based adhesive. It grips firmly enough for painting but is designed to release without pulling up the surface.
- Translucent blue. You can see the surface through the film, which makes positioning on wood grain, existing artwork, or alignment marks much easier.
- Built for paint and spray stencils on smooth, flat, rigid surfaces.
You will find ORAMASK and related materials in our stencil film collection.
Common Alternatives and When to Use Them
Crafters also use regular adhesive vinyl as stencil material, and each has its place:
| Material | Adhesive | Common stencil use |
|---|---|---|
| ORAMASK 813 | Low-tack, water-based | Painted signs, spray stencils, smooth rigid surfaces |
| ORACAL 631 | Removable, water-based | Painted wood signs and walls where you want easy release |
| ORACAL 651 | Permanent, solvent-based | Commonly used for glass etching cream stencils because it resists water and holds tight edges |
ORACAL 631 removable vinyl is a popular choice for painted wood signs because its matte face and removable adhesive release cleanly after painting. For etching cream on glass, many crafters reach for ORACAL 651 because its permanent adhesive holds a tight seal and stands up to the rinse. Since 651 is permanent, it is best kept to glass and other hard, nonporous surfaces where it will peel off without damage.
Cutting and Reverse Weeding a Stencil
Here is where stencils differ from decals. With a decal, you weed away the background and keep the design. With a stencil, you reverse weed: you remove the design itself and keep the background, because the open areas are where paint or cream will go.
- Design with bridges in mind. Letters like O, A, B, and R have centers (called counters) that will fall out. Save those pieces to place back by hand, or choose a stencil font with built-in bridges.
- Leave a wide border. Give yourself at least an inch or two of film around the design so you have room to brush or spray without hitting bare surface.
- Do a test cut. Stencil film and vinyl cut differently. Confirm the blade cuts cleanly through the film without scoring the backing.
- Weed out the design. Remove the letters and shapes, leaving the outline. Keep the small counters on the backing so you can reposition them later.
A sharp hook and good lighting make weeding much easier. Many of the tips in our post on weeding like a pro apply to stencil film as well.
Transferring the Stencil
Because a stencil is mostly open space with floating pieces, transfer tape holds everything in position as one unit. Lay transfer tape over the weeded stencil, burnish, then peel the backing away. Position the stencil on your surface and burnish thoroughly, especially along every cut edge, before removing the tape. If you are new to masking, our transfer tape guide walks through the process. Choose a lower-tack tape for stencil film so the tape does not overpower its light adhesive.
Painting Wood Signs Without Bleed
Wood is the hardest surface to stencil cleanly because grain creates tiny channels that paint can wick through. Whether you use ORAMASK or 631 as your stencil vinyl for painting wood signs, these general techniques help a lot:
- Sand and seal first. Start with a smooth surface. Lightly sand, wipe off dust, and apply your base coat or stain. Let it dry fully before applying the stencil.
- Seal the stencil edges. Before your lettering color, brush a thin coat of the base color, or a thin coat of clear Mod Podge, over the open areas. Any bleed fills with a color that matches the background or dries invisible, and it seals the edges for your next coat.
- Use a light hand. Dab with a stencil brush or foam pouncer instead of brushing strokes toward the edges. Multiple thin coats beat one heavy coat.
- Peel at the right time. Remove the stencil while the last coat is still slightly tacky, peeling back at a low angle. Waiting until the paint fully hardens can cause it to crack along the edge.
Etching Glass with Cream
Glass etching cream chemically frosts the surface of glass so the design becomes permanent. A glass etching stencil has one job: keep the cream exactly where you want it. Because the cream is a strong chemical product, safety comes first.
- Follow the manufacturer's directions for application time and rinsing, every time.
- Protect yourself. Wear chemical-resistant gloves and eye protection, work in a ventilated space, and keep the product away from children and pets.
- Prep the glass. Clean with isopropyl alcohol so the stencil seals fully, then burnish every edge.
- Apply thickly and evenly. Spread a generous layer over the open areas with a plastic tool, wait the recommended time, then rinse thoroughly before removing the stencil.
Etching cream only works on glass, not on most acrylic or plastic. Test on a scrap piece or hidden area first.
Skip the Chemicals with EasyPSV Etch
If you want the frosted look without handling etching cream, Siser EasyPSV Etch is a permanent adhesive film that creates a frosted, etched-glass appearance on glass and mirrors. Instead of a stencil, you cut and weed the design like a regular decal and apply it with EasyPSV Application Tape. It is a great option for classroom projects, quick customer orders, or anyone who prefers not to work with chemicals.
Frequently Asked Questions
What is the best vinyl for stencils?
ORAMASK 813 is designed specifically for paint stencils, with a low-tack adhesive and a translucent rigid film. ORACAL 631 is a popular alternative for painted signs, and ORACAL 651 is commonly used for etching cream on glass.
How do I keep paint from bleeding under my stencil?
Burnish all edges well, then seal them with a thin coat of base color or clear Mod Podge before applying your lettering color in light dabbing coats.
Can I reuse a vinyl stencil?
Adhesive stencils are generally single-use. Once they are lifted and coated with paint, they rarely seal as well a second time.
Is there a way to get an etched look without etching cream?
Yes. Siser EasyPSV Etch gives glass and mirrors a frosted, etched appearance with no chemicals involved.
Get Crisp Results on Your Next Project
With the right vinyl stencil material, careful reverse weeding, and sealed edges, painted signs and etched glass come out looking professional. Shop stencil film, ORACAL 631, EasyPSV Etch, and transfer tape at Atlanta Vinyl to get started.