
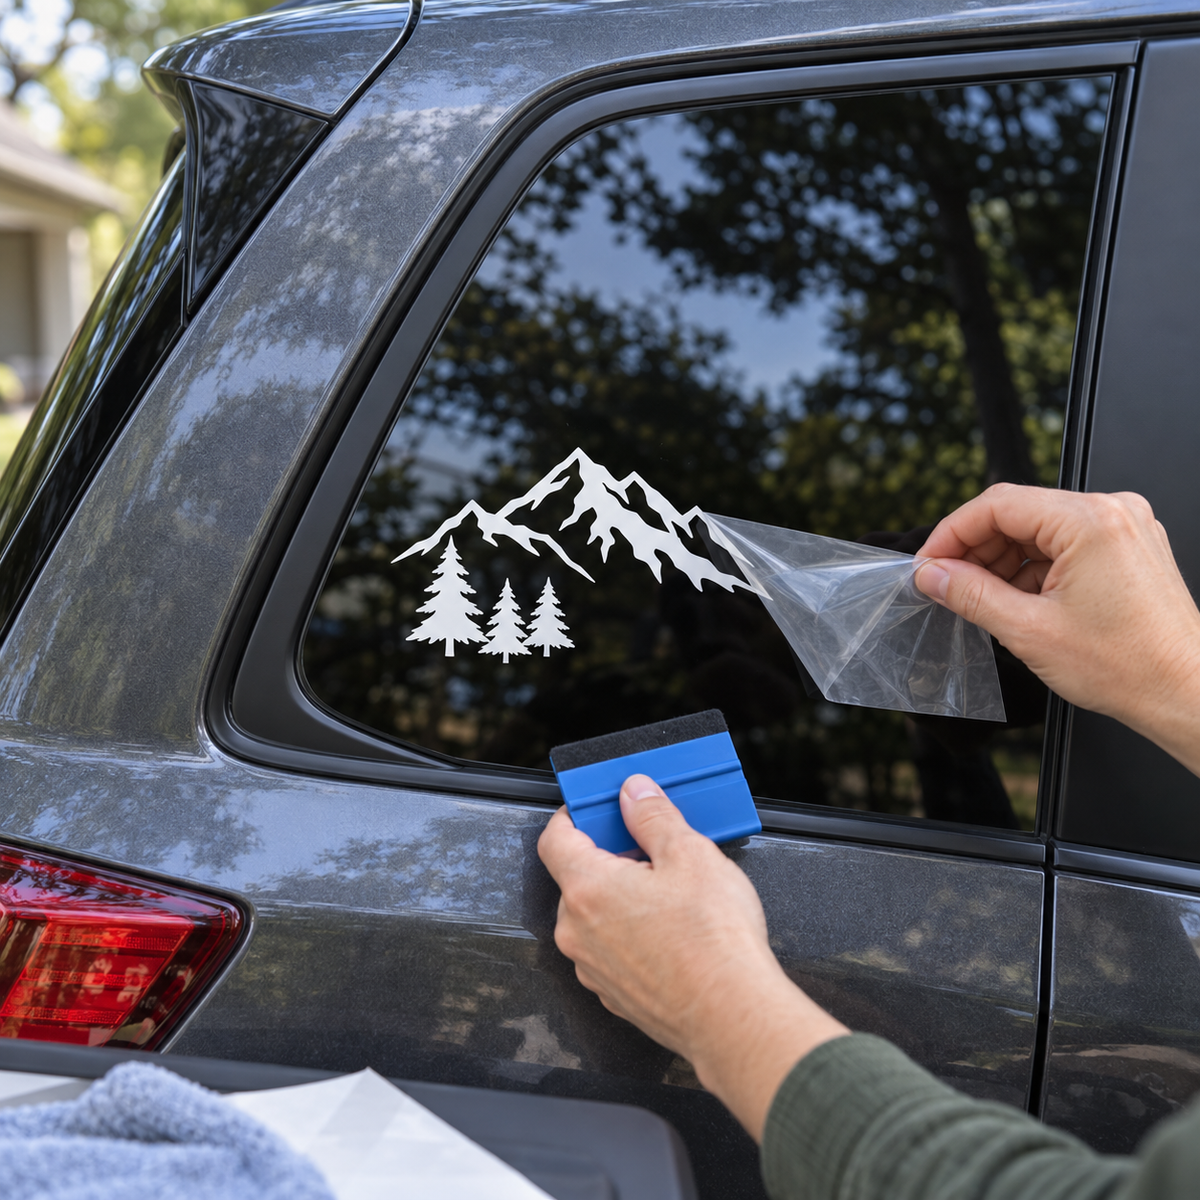
A good vinyl car window decal can advertise your business, show off your team spirit, or simply make your vehicle feel like yours, but a bad one peels at the corners after the first car wash. If you want to learn how to make car decals that look sharp and stay put through sun, rain, and highway wind, the secret is choosing the right material and taking your time with prep and application. This guide walks through every step, from design to removal.
Choose an Outdoor-Rated Vinyl
Car windows see direct sunlight, temperature swings, rain, road grime, and the occasional ice scraper, so indoor craft vinyl will not hold up. The go-to choice for most vehicle window decals is ORACAL 651 permanent adhesive vinyl. It is a 2.5 mil calendered PVC film with a clear, solvent-based permanent adhesive, and ORAFOL rates it for up to 6 years of outdoor durability for standard colors and transparent (vertical exposure), with metallics rated up to 4 years. It comes in 65 colors in both 12-inch and 24-inch widths, which gives you plenty of room for rear-window lettering.
For specialty decals that should light up in headlights, such as a business phone number on a work truck or a reflective accent on a trailer, consider ORALITE 5300 reflective vinyl. It is a 3.5 mil reflective film with a permanent clear solvent adhesive and a 7-year durability rating. It is thicker than 651, so plan for slightly bolder, simpler designs.
Real-world lifespan depends on climate, sun exposure, and how the vehicle is washed. Our post on how long outdoor adhesive vinyl lasts and what affects it covers those factors in detail.
Design for Size and Readability
A decal that looks great on your monitor can be unreadable from the next lane. Before you cut, measure the glass area you plan to use and design to fit, leaving a margin of an inch or so from the edges and any rubber seals.
- Keep fonts bold. Thin script fonts and hairline strokes are hard to weed, hard to read at a distance, and more likely to lift. Choose fonts with solid, even strokes.
- Use contrast. White, yellow, and bright colors read best on tinted glass. Dark colors can disappear against dark window tint.
- Limit the words. For business decals, a name, a service, and a phone number or website is usually all a passing driver can absorb.
- Test at distance. Print your design to scale on paper, tape it to the window, and step back 20 or 30 feet. If you cannot read it, neither can anyone else.
Outside vs. Inside the Glass (and Mirrored Designs)
Many people ask about putting a decal on the inside of the window to protect it from scrapers and car washes. That requires a mirrored design and a face-adhesive (inside-glass) product, where the adhesive sits on the printed face and presses against the glass from inside. ORACAL 651 is designed for outside application, with the adhesive on the back of the film.
For most projects, our recommendation is simple: apply 651 on the outside of the glass and do not mirror the design. It is rated for outdoor exposure, it is easier to apply, and it reads correctly to anyone behind you. Just keep it out of the wiper path, which we cover below.
Cut, Weed, and Mask
Cut your design with the vinyl colored side up on the mat, then weed away the excess. Leave a small border of weeding box around the design to make alignment easier. Next, apply a medium-tack transfer tape over the top. Clear tape with a grid makes it easy to keep lettering level, and you can find options in our transfer tape for adhesive vinyl collection. If you are new to masking, read our step-by-step guide to using transfer tape before your first decal.
Prep the Glass and Check the Temperature
Most decal failures start with dirty glass. Wash the window with soapy water to remove road film, dry it, then wipe the application area with isopropyl alcohol on a lint-free cloth. Avoid glass cleaners that leave behind ammonia, silicone, or anti-rain coatings, because those residues interfere with the adhesive.
Temperature matters too. ORACAL 651 has a minimum application temperature of 46°F. Below that, the adhesive does not flow into the surface properly. In practice, a shaded spot on a mild day works best: glass that has been baking in the sun can make the vinyl stretch and grab too early, while cold glass keeps the adhesive from bonding.
Avoid Defroster Lines and the Wiper Path
Rear windows often have defroster grid lines that create small ridges. Vinyl laid over those lines can tent and trap air along the edges. Where possible, position your decal in a clear area of the glass, or design it so that letters do not run along a defroster line. Also note where the rear wiper travels. A wiper blade dragging across the edge of a decal every time it rains will lift it sooner than anything else. Mark the wiper sweep with painter's tape before you plan your placement.
Apply with the Hinge Method
The hinge method gives you precise placement and keeps bubbles to a minimum on large decals:
- Position the masked decal on the glass and step back to check that it is level.
- Place a strip of masking tape across the middle (or along the top edge for smaller decals) to create a hinge.
- Flip one half of the decal up over the hinge and peel the backing paper away up to the hinge. Cut the backing paper off.
- Holding the exposed half slightly away from the glass, squeegee from the hinge outward with firm, overlapping strokes.
- Remove the hinge tape, lift the second half, peel away the remaining backing, and squeegee from the center out.
- Burnish the whole decal once more, then peel the transfer tape back slowly at a low angle, nearly parallel to the glass.
If a letter tries to come up with the tape, lay the tape back down, burnish that area again, and keep peeling. For large or tricky decals, some installers prefer applying wet so they can slide the decal into place. Our comparison of the wet method vs. dry method explains when each makes sense. If you go wet, allow extra time before removing the tape.
Let It Cure Before the Car Wash
Permanent adhesive builds its bond over time. Give a new decal a few days before you send the car through an automatic wash or point a pressure washer at it. Even after it has cured, keep pressure washer nozzles away from decal edges, and avoid scraping ice directly across the vinyl in winter.
Check Local Laws Before You Apply
Rules about what can go on a vehicle's windows, and where, vary by state and municipality. Some areas restrict decals on the windshield or front side windows, or limit how much of the rear window can be covered. Check your local and state regulations before installing, especially for large rear-window graphics or perforated designs.
How to Remove an Old Car Decal
When it is time for a change, warm the decal with a hair dryer or heat gun on a low setting to soften the adhesive. Lift a corner with a plastic razor blade and peel slowly at a low angle, reheating as needed. Remove any leftover adhesive with an adhesive remover safe for automotive glass, then clean with isopropyl alcohol. Do not use a metal razor near tint film or defroster lines. For more techniques, see our guide on removing old adhesive vinyl from hard surfaces.
Frequently Asked Questions
What is the best vinyl for car window decals?
ORACAL 651 is the most popular choice because it is a permanent, outdoor-rated vinyl with up to 6 years of outdoor durability for standard colors (vertical exposure). For reflective decals, ORALITE 5300 is a good option.
Can I put a vinyl decal on the inside of my car window?
Inside-glass decals need a mirrored design and a face-adhesive product. ORACAL 651 is built for outside application, so apply it to the outside of the glass.
How long should I wait to wash my car after applying a decal?
Wait a few days so the adhesive can fully bond, and avoid aiming a pressure washer directly at the decal edges even after it has cured.
What temperature is too cold to apply a car decal?
ORACAL 651 has a minimum application temperature of 46°F. Apply in mild weather and in the shade for the best results.
Start Your Next Car Decal Project
Learning how to make car decals that last comes down to outdoor-rated vinyl, clean glass, careful placement, and a little patience while the adhesive cures. Stock up on ORACAL 651, ORALITE reflective film, and transfer tape at Atlanta Vinyl, and your next vinyl car window decal will look as good in a year as it does on day one.