
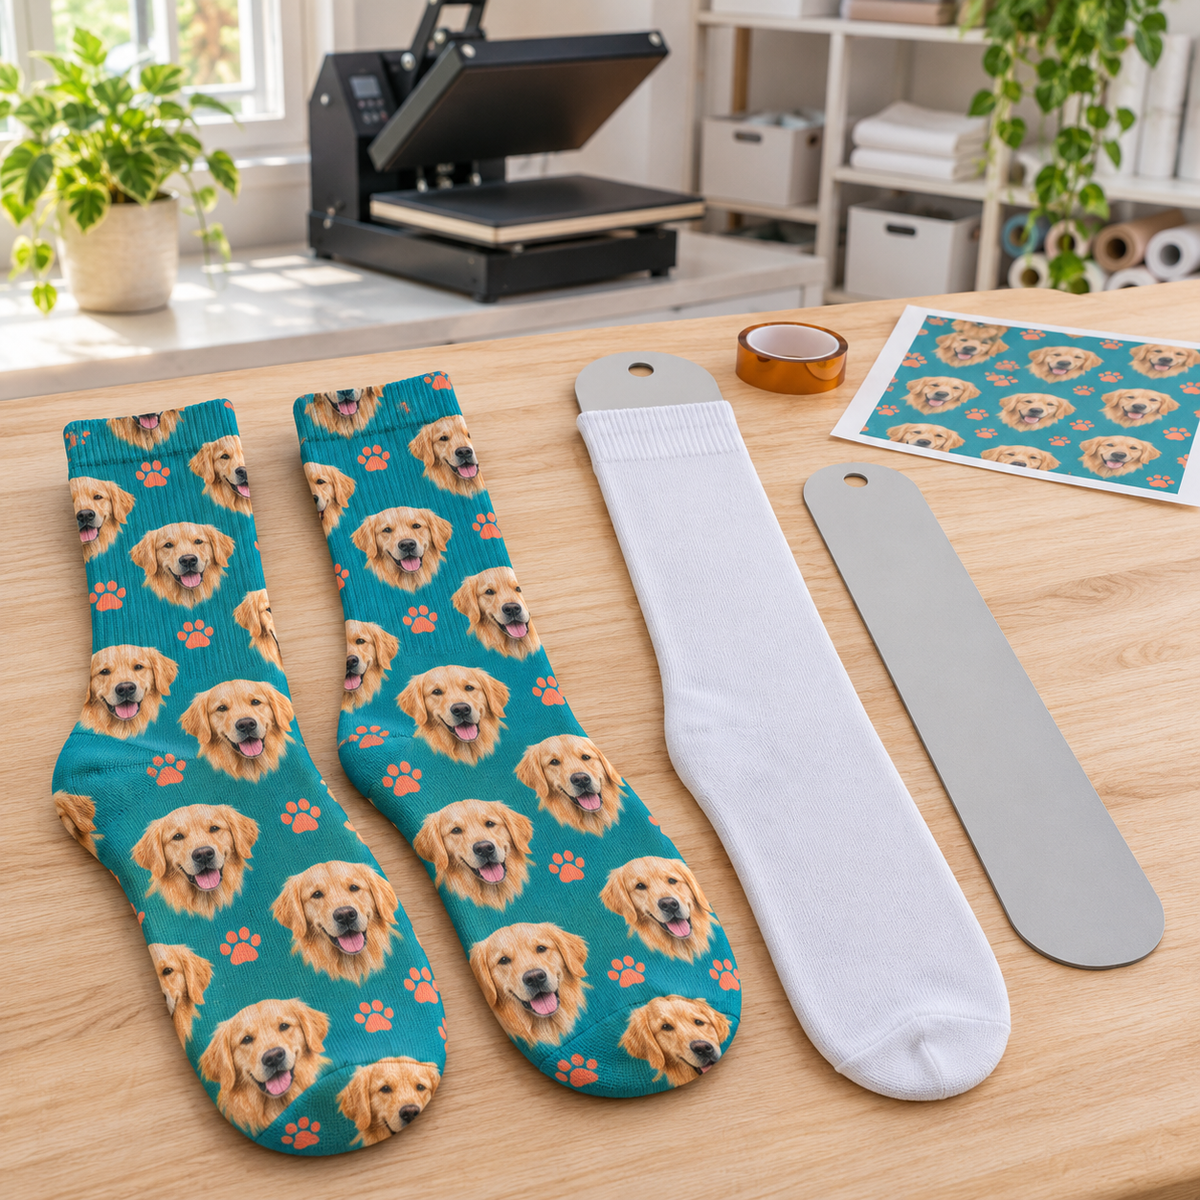
Custom socks are one of the most fun products you can make with sublimation. Pet faces, team colors, groomsmen gifts, company logos and holiday prints all look amazing on a pair of socks, and they sell well at a strong margin. But socks have a reputation for being tricky. Without the right setup, you get creases, white lines down the sides and designs that land in the wrong place on the foot. This guide shows you how to sublimate socks cleanly every time.
What You Need
- Polyester sublimation socks. Sublimation only bonds to polyester, so the printable area must be high-polyester. We carry Silky Socks sublimation blanks, including athletic socks, streetwear crew socks, dress socks, knee highs and kids' socks.
- Sock jigs (inserts). These are flat forms that slide inside the sock to stretch it evenly. Options include jigs for streetwear and dress socks and jigs for knee high socks.
- Sublimation printer, ink and paper. Shop sublimation paper and sublimation ink.
- A heat press, butcher paper and heat-resistant tape.
Why Socks Get Creases and White Lines
- Creases happen when the sock is not stretched flat. Any fold blocks the ink and leaves a white line.
- White side edges happen where the sock wraps around the edge of a jig. The fold point does not get ink from either side.
- Ink bleeding through happens when there is nothing inside the sock to stop the ink from reaching the back layer.
Jigs solve all three problems by holding the sock flat, keeping the front and back separated and giving you a consistent shape to design for.
Silky Socks Press Settings
The Silky Socks print instructions for their athletic and streetwear socks are 400°F for 30–35 seconds. The athletic sock leg is 95% polyester and 5% rubber/spandex for vibrant prints, while the foot is a cushioned, cotton-rich blend for comfort. Silky Socks notes their socks have been sublimated on presses from 9" x 12" and up, and recommends using their jigs for the best results.
For a deeper look at sublimation basics, read how the sublimation process works.
Step-by-Step: How to Sublimate Socks
1. Create your design template
Measure the sock on the jig and create a template in your design software slightly larger than the printable area so the design bleeds past the edges. Make one design for the front and one for the back, or mirror the same design for both. If the design has a direction, like a face or text, make sure it points the right way on the left and right sock.
2. Print in mirror image
Print each side on sublimation paper using your sublimation color profile.
3. Insert the jig
Slide the jig into the sock and stretch the sock evenly. Line up the heel and side seams so they sit flat and straight. The tighter and smoother the sock, the cleaner the print.
4. Lint roll and pre-press
Roll off any lint, then pre-press briefly with butcher paper on top to remove moisture and flatten fibers.
5. Position and tape the transfer
Lay the transfer ink side down on the sock, align it with the heel and toe, and tape it in place. Place butcher paper on top and underneath.
6. Press the first side
Press at 400°F for 30–35 seconds with light to medium pressure. Too much pressure can create jig outlines and shiny marks.
7. Flip and press the second side
Remove the paper, flip the sock on the jig, tape the second transfer and press again. Protect the first side with clean butcher paper underneath.
8. Remove and cool
Peel the paper while hot, carefully slide the jig out with gloves, and let the sock cool flat.
How to Reduce White Side Lines
- Use a design with a busy pattern. All-over prints, camo, florals and repeating patterns hide the edges better than solid colors.
- Extend the design past the edges so both sides overlap at the fold.
- Stretch the sock tightly and keep seams centered on the edge of the jig.
- Choose sock styles made for all-over printing, like streetwear crews and the matching inserts.
Common Mistakes
- Using cotton socks. Sublimation will not bond to cotton. Read can you sublimate on cotton.
- Skipping the jig. Cardboard or paper inserts can work in a pinch, but they flex and lead to creases.
- Not protecting the press. Always use butcher paper on both sides to keep ink off your platens.
- Too much pressure. Heavy pressure can show the jig outline or cause shine.
- Dull colors. See why your sublimation colors look dull.
Sock Ideas That Sell
- Pet face and pet pattern socks
- Groomsmen and wedding party socks
- Team and school spirit socks
- Corporate logo socks for trade shows
- Holiday socks for Christmas, Valentine's Day and St. Patrick's Day
- Matching family socks for photos
- Kids' character-free patterns, like dinosaurs, rainbows and sports
Remember: never print copyrighted characters or logos without permission. Read custom apparel and copyrights.
Frequently Asked Questions
Can I sublimate socks on a small press?
Yes. Silky Socks notes their athletic socks can be printed on presses from 9" x 12" and up. A larger press makes knee-high styles easier.
Can I print both socks at once?
If your platen is large enough and the jigs fit side by side, you can press two at a time. Make sure pressure is even across both.
How do I care for sublimated socks?
Wash inside out on cold and tumble dry low. Sublimated prints become part of the fabric, so they will not crack or peel.
The secret to great sublimated socks is preparation: polyester socks, the right jig, a tight stretch and a design that bleeds past the edges. Get those right and socks become one of the most fun and profitable products in your shop. Explore more blanks in our sublimation blanks collection.