(And Exactly How to Fix It When Our Gang-Sheet Builder Flags Your File)
1. What “Resolution” Really Means
| Term | Short Definition | Why It Matters for Printing |
|---|---|---|
| PPI / DPI | Pixels-per-inch (on-screen) / Dots-per-inch (on paper) | More dots per inch = more detail the ink can describe. |
| Native Resolution | The pixel dimensions your file was born with (e.g., 2400 × 3000 px) | Stretching larger than native size spreads pixels thin & blurs detail. |
| Effective Resolution | DPI after you scale the image in our builder | This is what our color-coded bounding box measures. |
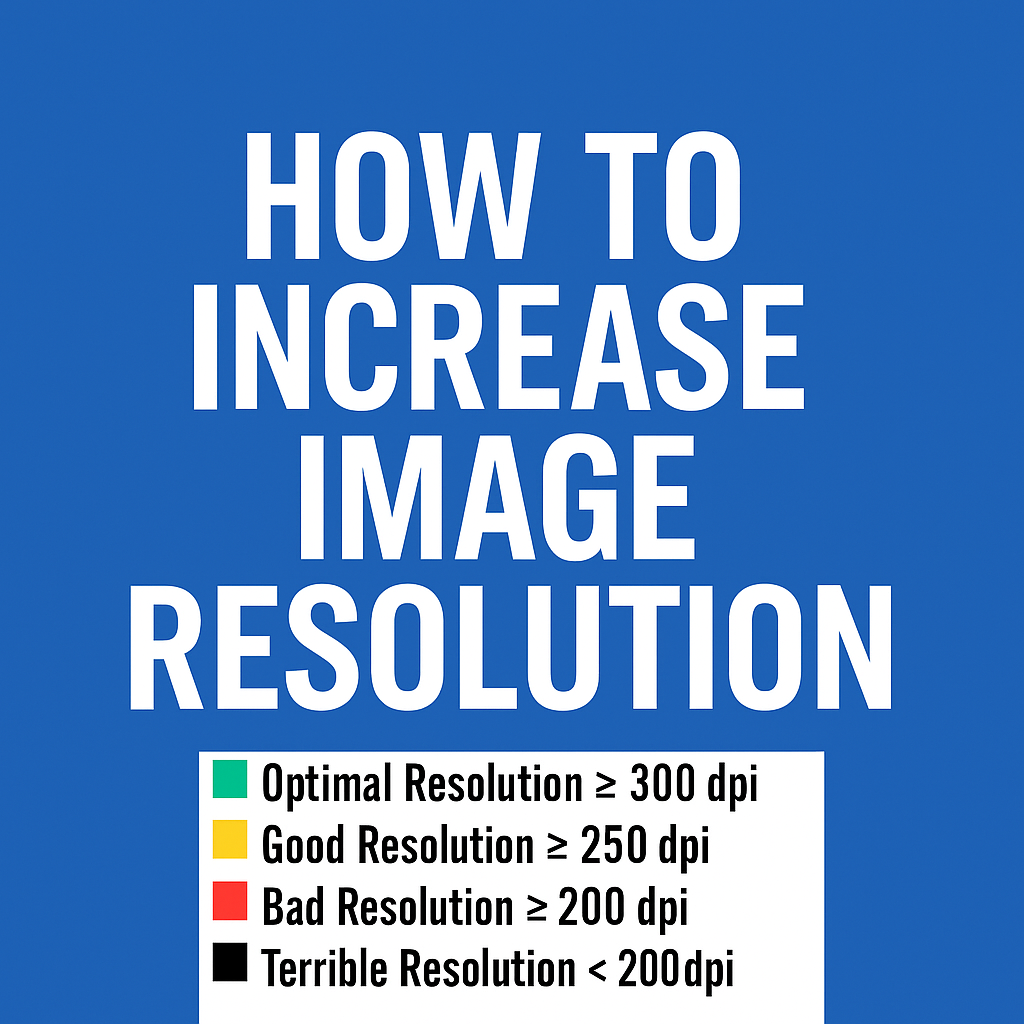
Our thresholds:
Optimal Resolution ≥ 300 DPI (Green)
Good Resolution ≥ 250 DPI (Yellow)
Bad Resolution ≥ 200 DPI (Red)
Terrible Resolution < 200 DPI (Black)
2. How Low Resolution Shows Up in Your Finished Prints
- Blurry edges around text and logos
- Pixelation (blockiness) in photos
- Loss of fine details (small text becomes unreadable)
- Banding or uneven color in gradients
Once ink is on your garment, those artifacts are permanent—so it’s always cheaper to fix resolution before you upload.
3. Seven Proven Ways to Boost Image Resolution
A. Export at the Correct Size
Canva: Download → File type PNG → move the Size slider to 2× (or enter exact pixel dimensions) → check Transparent background if needed.
Adobe Illustrator: File → Export → Export As → PNG (300 PPI) → Use Artboards → Scale 100%.
Canva | Illustrator
B. Design in Vector & Export as PNG @ 300 DPI
Work in vector format (AI, SVG, EPS) for logos or line art—vectors scale infinitely without loss. Export to PNG only when you need a raster file at the final size.
Free option: Inkscape
C. Start with a Proper Document Size
In Photoshop or Affinity Photo, create a new document at the exact print dimensions (10" × 10" for example) and 300 PPI before placing any images. Resize images down, not up.
D. Scan Art at High DPI
For hand-drawn artwork, scan at 600 DPI, clean up in Photoshop, then optionally down-sample to 300 DPI to keep file sizes manageable.
E. AI Upscaling Tools
If you’re stuck with a low-res file, AI upscalers can invent missing detail:
• Topaz Gigapixel AI
• Adobe Super Resolution
• Let’s Enhance
• Runway ML Upscale
• waifu2x (great for line art/anime)
F. Combine Multiple Photos (“Super-Resolution Stacking”)
Shoot a burst of identical photos, then in Photoshop: File → Scripts → Load Files into Stack → Auto-Align → Convert to Smart Object → Layer → Smart Objects → Stack Mode → Median. Great for static subjects.
G. Re-Create Problem Text
Delete blurry text and re-type it in your design app as vector text. Then export again at 300 DPI.
4. Step-by-Step Example (Canva)
-
Set Final Dimensions First
Click Resize → enter width/height in inches, set 300 DPI (Pro) or double the pixel dimensions (free). -
Import Graphics at or Above Print Size
Drag in high-res PNG/SVG; avoid small web JPGs. -
Download Correctly
Share → Download → PNG → Size slider 3.125× → Transparent (if needed) → Download. - Upload to Gang-Sheet Builder — your box should stay green.
5. Best Practices Cheat Sheet
- Always start at 300 DPI when creating or scanning artwork.
- Vector first, raster later. Keep originals in AI/SVG/PDF.
- Never enlarge screenshots; find the source file or use AI upscaling.
- Check effective DPI after every size change (our color box makes this easy).
- Save originals—AI tools keep improving, so you can re-upscale later.
6. Frequently Asked Questions
“Can I just change 72 DPI to 300 DPI in Photoshop?”
No—typing 300 in the DPI box without enabling “Resample” only re-labels the file. You must add pixels (via resampling or AI upscaling) to gain real detail.
“Is 150 DPI ever okay?”
Only for large-format pieces viewed from a distance (billboards, banners). For garments, stickers, or anything inspected up close, stay at 300 DPI.
“My file is SVG—why is it showing red in the builder?”
It was probably exported as a low-res PNG. Re-export at 300 DPI or upload the native SVG/PDF if the builder supports it.
7. Need More Help?
If you’ve tried the tips above and our builder still shows a red or black box, just reply to your order email with the artwork attached. We’ll review it and recommend the fastest fix (or upscale it for you).
Happy designing, and may every box you see be green!