Haben Sie schon mal ein individuell gestaltetes T-Shirt mit einem witzigen Spruch oder eine personalisierte Tragetasche mit einem schönen Design gesehen und gedacht: „Das möchte ich auch machen“? Gute Nachricht: Das können Sie! Der Trick hinter vielen dieser individuellen Kreationen ist Transferfolie (HTV), und sie gehört zu den zugänglichsten und lohnendsten Handwerkstechniken für Anfänger.
Mit HTV (Heißfolie) lassen sich digitale Designs mit wenigen Handgriffen in tragbare Kunst verwandeln. Auch wenn es anfangs kompliziert erscheinen mag, ist der Prozess überraschend einfach. Dieser Leitfaden führt Sie durch alles, was Sie für Ihr erstes HTV- Vinylprojekt wissen müssen – von der Materialauswahl bis zum Pressen Ihres fertigen Designs.
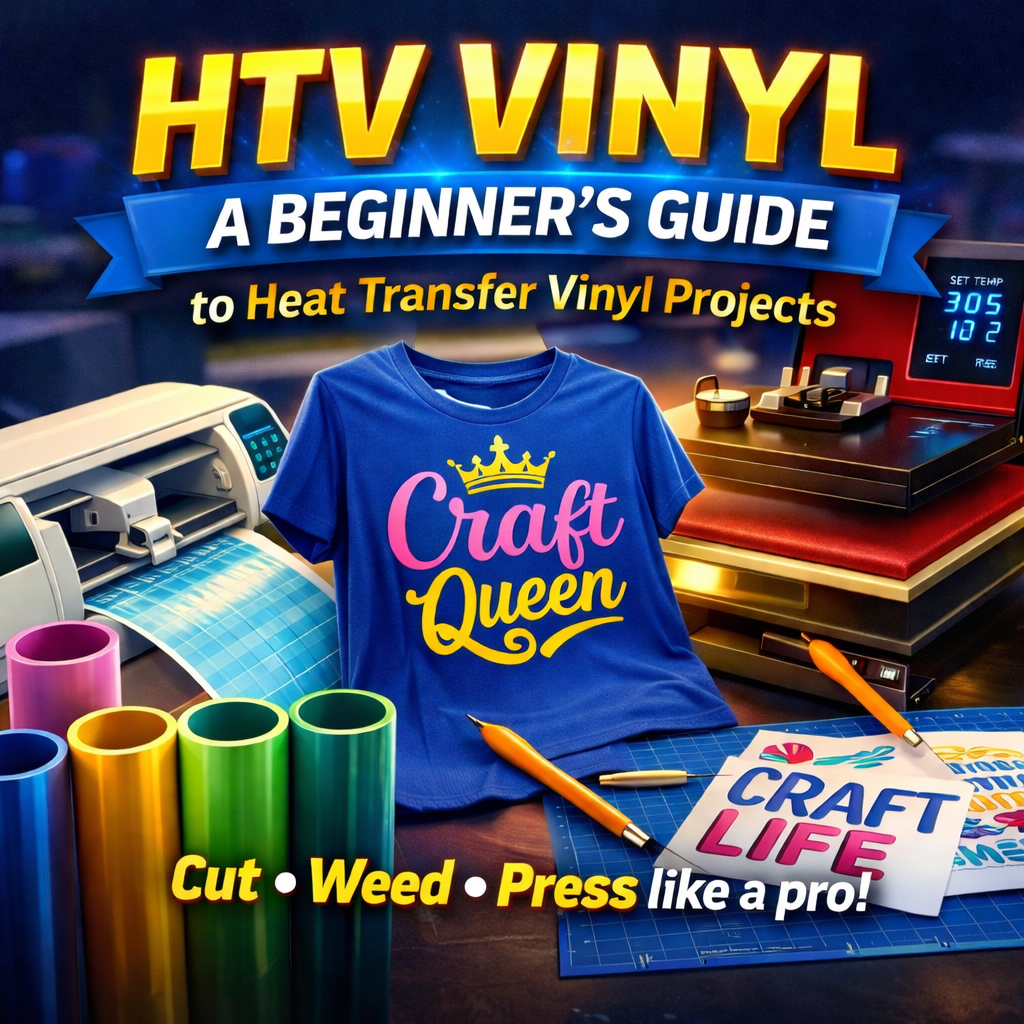
Was genau ist Wärmeübertragungsfolie (HTV)?
Transferfolie ist ein Spezialmaterial mit einem einseitig wärmeaktivierten Klebstoff. Sie befindet sich auf einer transparenten Trägerfolie, die Ihr Motiv während des Aufbringens fixiert. Durch Hitze und Druck schmilzt der Klebstoff und verbindet die Folie dauerhaft mit dem Stoff.
Es wird oft als „Bügelfolie“ bezeichnet, aber für optimale, professionelle Ergebnisse empfiehlt sich die Verwendung einer Transferpresse anstelle eines Bügeleisens. Bügelfolie gibt es in einer beeindruckenden Vielfalt an Farben und Oberflächen, von klassischen matten und glänzenden Varianten bis hin zu aufregenden Texturen wie Glitzer, Hologramm und sogar 3D- Puff-Vinyl .
Die wichtigsten Werkzeuge für Ihr erstes HTV-Projekt
Bevor Sie Ihren Entwurf zum Leben erwecken können, benötigen Sie einige wichtige Werkzeuge.
- Transferfolie (HTV): Anfängern empfehlen wir eine hochwertige, einfach anzuwendende Folie wie Siser EasyWeed. Sie macht ihrem Namen alle Ehre und erleichtert das Entgittern erheblich. In unserer Transferfolien- Kollektion (HTV) finden Sie eine riesige Farbauswahl.
- Ein Vinylschneider: Dies ist eine digitale Schneidemaschine, die Ihr Design präzise in Vinyl schneidet. Beliebte Marken für Hobbybastler sind Cricut und Silhouette.
- Entgitterungswerkzeuge: Das sind kleine, scharfe Werkzeuge, die Zahnarztinstrumenten ähneln. Sie dienen dazu, überschüssiges Vinyl nach dem Zuschneiden zu entfernen. Für den Anfang reicht ein einfacher Entgitterungshaken.
- Eine Transferpresse: Ein Bügeleisen tut es zwar im Notfall, aber eine Transferpresse ist ein echter Gamechanger für Qualität und gleichmäßiges Ergebnis. Sie sorgt für die gleichmäßige Temperatur und den festen Druck, die für eine dauerhafte Verbindung nötig sind. Klapp- oder Schwenkpressen sind beides hervorragende Optionen.
- Eine Teflonfolie oder Pergamentpapier: Diese wird zwischen die Heizpresse und Ihre Vinylfolie gelegt, um den Stoff zu schützen und zu verhindern, dass die Trägerfolie der Vinylfolie an der Heizplatte kleben bleibt.
- Dein „Rohling“: Das ist der Gegenstand, den du verzieren möchtest, zum Beispiel ein T-Shirt, ein Hoodie, eine Stofftasche oder eine Mütze. Für dein erstes Projekt ist ein T-Shirt aus 100 % Baumwolle oder einem Baumwoll-Polyester-Gemisch eine gute Wahl.
Schritt-für-Schritt-Anleitung zur Verwendung von HTV-Folie
Bereit, dein erstes individuelles T-Shirt zu gestalten? Lass uns den Prozess Schritt für Schritt durchgehen.
Schritt 1: Erstellen und Vorbereiten Ihres Designs
Erstellen oder wählen Sie zunächst ein Design in der Software Ihres Schneideplotters (z. B. Cricut Design Space oder Silhouette Studio). Für Ihr erstes Projekt empfiehlt sich ein einfaches Design – fetter Text oder eine einfache Form sind ideal.
WICHTIGER SCHRITT: Spiegeln Sie Ihr Design!
Bevor du dein Design an den Schneideplotter sendest, musst du es unbedingt spiegeln (horizontal drehen). Da du die Vinylfolie von der Rückseite schneidest, ist dein Design spiegelverkehrt, wenn du es auf das Shirt aufbringst. Das ist der häufigste Fehler von Anfängern.
Schritt 2: Schneiden Sie Ihr Vinyl zu.
Legen Sie Ihre HTV-Vinylfolie mit der glänzenden Seite (der transparenten Trägerfolie) nach unten auf Ihre Schneidematte. Die matte, klebende Seite zeigt nach oben. Legen Sie die Matte in Ihren Schneideplotter ein und folgen Sie den Anweisungen der Software, um das Motiv auszuschneiden. Stellen Sie sicher, dass die Einstellungen Ihres Geräts für die verwendete Vinylart (z. B. „Bügelfolie“ oder „Heißtransferfolie“) korrekt sind.
Die Klinge sollte die Vinylfolie durchschneiden, aber nicht die darunterliegende transparente Trägerfolie.
Schritt 3: Entwirren Sie Ihr Design
Sobald der Schnitt abgeschlossen ist, entfernen Sie die Vinylfolie von der Schneidematte. Dies ist der sogenannte „Entgitterungsschritt“, bei dem Sie die gesamte Vinylfolie entfernen, die nicht zu Ihrem Design gehört.
Beginnen Sie, indem Sie die größere Vinylfläche um Ihr Motiv herum abziehen. Entfernen Sie anschließend mit einem Entgitterungswerkzeug die kleineren Teile, beispielsweise die Innenseiten von Buchstaben (wie „o“ oder „e“). Arbeiten Sie sorgfältig und in einem gut beleuchteten Bereich. Hierbei ist eine hochwertige Vinylfolie wie Siser EasyWeed besonders hilfreich, da sie sich sauber und ohne Einreißen ablösen lässt.
Wenn Sie fertig sind, sollte auf der transparenten Trägerfolie nur noch Ihr spiegelverkehrtes Design zu sehen sein.
Schritt 4: Bereiten Sie Ihr Kleidungsstück vor und bügeln Sie es.
Schalten Sie Ihre Transferpresse ein und stellen Sie die für Ihre spezifische HTV-Folie empfohlene Temperatur ein . Für Siser EasyWeed auf Baumwolle liegt diese typischerweise bei etwa 150 °C (305 °F).
- Vor dem Pressen: Legen Sie Ihr T-Shirt auf die Presse und pressen Sie es 5–10 Sekunden lang. Dadurch werden Feuchtigkeit und Falten aus dem Stoff entfernt und eine saubere Oberfläche für die Vinylfolie geschaffen.
- Positioniere dein Design: Finde die Mitte deines Shirts und platziere dein entgittertes Design darauf. Die Klebeseite der Trägerfolie sorgt für sicheren Halt. Das Design sollte nun korrekt aussehen (nicht mehr spiegelverkehrt). Verwende ein Lineal, um sicherzustellen, dass es gerade und zentriert ist. Als Faustregel gilt: Platziere die Oberkante des Designs etwa 7,5 cm unterhalb des Kragens.
- Der erste Pressvorgang: Legen Sie Ihre Teflonfolie oder Ihr Backpapier über das Motiv. Schließen Sie die Heizpresse und üben Sie für die empfohlene Zeit, in der Regel 10–15 Sekunden, festen Druck aus.
Schritt 5: Trägerfolie abziehen
Sobald die Zeit abgelaufen ist, öffnen Sie die Presse. Nun können Sie die transparente Trägerfolie abziehen. Beachten Sie die Anweisungen für Ihre spezifische Vinylfolie, um festzustellen, ob es sich um ein Produkt zum „Heißabziehen“, „Warmabziehen“ oder „Kaltabziehen“ handelt.
- Heiß abziehen: Sie können die Trägerfolie sofort abziehen.
- Warm/Kalt schälen: Sie müssen einige Sekunden warten (oder bis es vollständig abgekühlt ist), bevor Sie es schälen.
Siser EasyWeed lässt sich heiß oder kalt abziehen und bietet Ihnen somit Flexibilität. Ziehen Sie die Trägerfolie in einem Winkel von 45 Grad ab. Sollten Sie bemerken, dass sich Teile der Vinylfolie ablösen, ziehen Sie sie nicht weiter ab. Legen Sie die Trägerfolie wieder auf, decken Sie sie mit der Teflonfolie ab und drücken Sie sie weitere 5–10 Sekunden an.
Sobald die Trägerfolie entfernt ist, ist Ihr Projekt abgeschlossen! Es wird generell empfohlen, 24 Stunden zu warten, bevor Sie das Kleidungsstück waschen. Drehen Sie es dann auf links, um das Design zu schützen.
Du bist bereit, kreativ zu werden!
Das war's schon! Sie haben soeben die Grundlagen der individuellen Textilgestaltung mit Transferfolie gelernt. Jetzt eröffnet sich Ihnen eine Welt voller kreativer Möglichkeiten. Experimentieren Sie mit verschiedenen Vinylfarben, probieren Sie Spezialeffekte wie Glitzer oder Metallic aus oder greifen Sie zu strukturierten Materialien wie Puffvinyl, um Ihren Designs 3D-Effekte zu verleihen.
Der Schlüssel zum Erfolg liegt in der Verwendung hochwertiger Materialien und sorgfältiger Planung. Experimentieren Sie ruhig und haben Sie Spaß dabei! Entdecken Sie unsere gesamte HTV-Vinyl -Kollektion bei Atlanta Vinyl und verwirklichen Sie noch heute Ihre kreativen Ideen.